Assigning Query Security Permissions to Roles
Most security permissions are assigned to roles in the Users App > Security. (See the help topic, Assigning Security Permissions to User Roles.) Query security permissions, however, are configured in the Query Builder.
While users with an Administrator role automatically have access to all areas (including queries), for other roles the security permissions to access and run queries are assigned on a query-by-query basis. This allows admins to specify exactly which queries certain roles have access to.
-
Log in as an Administrator.
-
Navigate to the query for which security permissions should be granted. This can be from three areas:
-
the Queries App > Query Center
-
any App allowing access to queries (such as the Customers App > Queries)
-
or from the Query Builder.
-
-
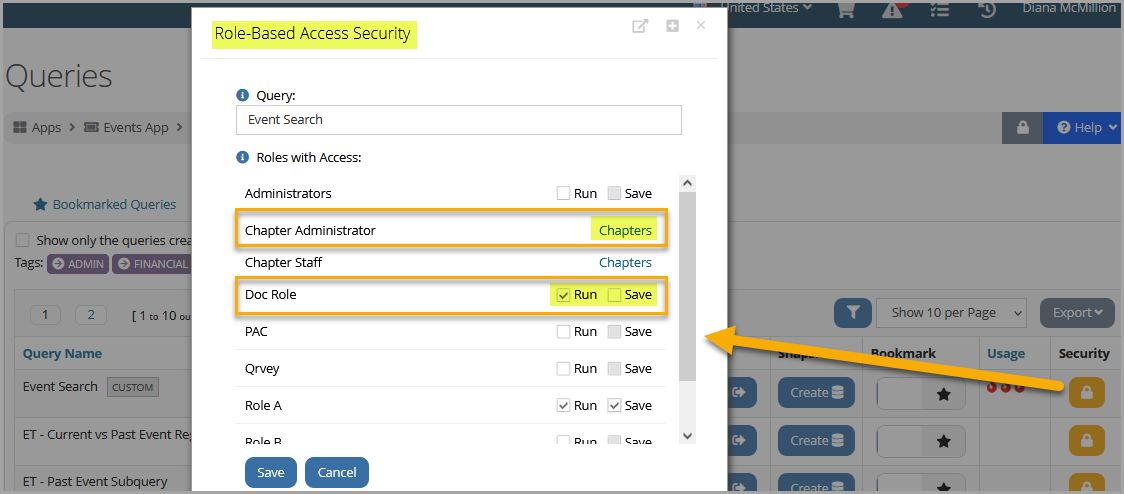
Locate and click the Security padlock icon for that query. (Only administrators have access to this icon.)
If you're viewing the Query Center, this padlock will appear to the right of the query in the list. From the Query Builder, it will appear at the bottom of the form.
The Role-Based Access Security form will appear. -
In the Role-Based Access Security form, the name of the query being edited appears at the top. A list of roles that can be given access is listed in the Roles with Access section.
-
Locate the desired role(s) and enable the option to Run, or to Run and Save.
-
Run: This setting allows users to run the query. When this check box is clicked, the Save option also becomes available.
-
Save: This setting allows users to edit and save changes to the query. This option is only selectable when the Run check box is clicked.
-
-
Click Save.
Note: When configuring role security settings, it is always recommended that administrators test the role being configured to ensure proper access to necessary features. This can be done by assigning the role being tested to a test account and by logging in as that test user.
Assigning Query Security Permissions to Chapter Roles
For clients using the enhanced chapter configuration, the process to assign query security permissions to chapter roles looks slightly different. Follow steps 1-4, described above.
-
Locate the chapter role to be edited, and click the Chapters hyperlink next to that role. The Add Chapter Access form will appear.
-
In the Add Chapter Access form, choose the option Can Save or Can Run next to each chapter.
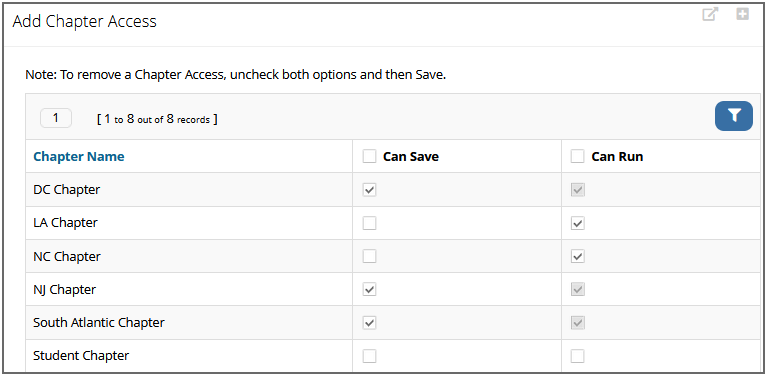
Example: When editing the role "Chapter Administrator," if Can Save is enabled for "Chapter A" and "Chapter B," that means that users associated with those two chapters with a Chapter Administrator role will be able to save changes to the query.
-
Click Save in the Add Chapter Access form.
-
Click Save in the Role-Based Access Security form.